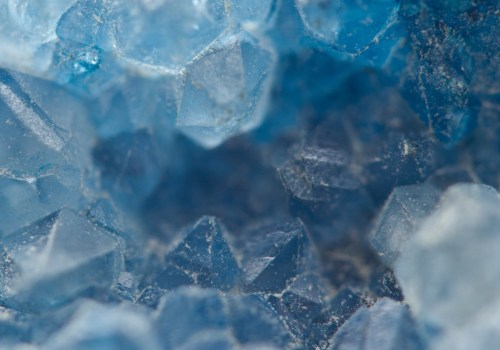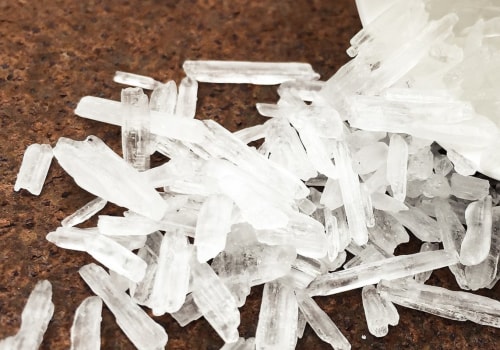
Crystal cultivation is an enchanting practice that allows individuals to create stunning, unique crystals right in the comfort of their own homes. This fascinating process not only taps into the beauty of nature but also offers a rewarding experience that combines science and art. By understanding the fundamentals of how crystals form, anyone can embark on a journey to grow their own beautiful specimens, transforming simple materials into dazzling creations. At its core, crystal cultivation involves the careful manipulation of solutions to encourage the growth of crystals. This process begins with nucleation, where tiny crystal seeds form in a saturated solution.
As conditions are adjusted—such as temperature and concentration—these seeds can grow into larger, more intricate structures. The allure of growing crystals lies not only in the visual appeal but also in the satisfaction derived from nurturing these natural wonders from start to finish. The benefits of cultivating crystals extend beyond mere aesthetics. Engaging in this hobby can enhance your understanding of chemistry and geology, providing practical insights into the natural world. Additionally, growing crystals can be a meditative practice, offering a sense of calm and focus as you watch your creations develop over time.
Whether you are looking to decorate your space with beautiful pieces or seeking a new hobby that combines creativity with scientific exploration, crystal cultivation is an excellent choice. In this guide, we will delve deeper into the various methods for growing crystals, explore different types of crystals you can cultivate, and provide tips for ensuring successful growth. Prepare to unlock the secrets of crystal formation and discover how you can bring a touch of nature's beauty into your life through this captivating craft.
Understanding Crystals and Their Formation
To truly appreciate the art of crystal cultivation, it is essential to understand the science behind how crystals form. Crystals are solid materials whose atoms are arranged in a highly ordered, repeating pattern. This orderly structure is what gives crystals their unique shapes and properties.The process of crystal formation, known as crystallization, can occur through various methods, including cooling a liquid solution, evaporation, or even sublimation. One of the primary ways crystals form is through the cooling of a saturated solution. As the temperature decreases, the solubility of the solute diminishes, leading to the formation of solid crystals. This process begins with nucleation , where small clusters of atoms or molecules come together to form a stable structure. Nucleation can be spontaneous or induced by external factors such as vibrations or impurities in the solution. Once nucleation occurs, the crystals begin to grow as more atoms or molecules attach themselves to the existing structure.
The rate of growth can be influenced by several factors, including temperature, concentration of the solution, and the presence of impurities. For instance, a slow cooling process often results in larger and more well-defined crystals, while rapid cooling may lead to smaller and less organized formations.
Types of Crystals
Crystals can be classified into several categories based on their structure and formation process:- Ionic Crystals: Formed from ionic bonds between positively and negatively charged ions. Common examples include table salt (sodium chloride) and quartz.
- Covalent Crystals: Composed of atoms connected by covalent bonds. These crystals are typically very hard and have high melting points, such as diamond.
- Metallic Crystals: Consist of metal atoms that share electrons freely, resulting in good electrical conductivity.
Examples include copper and gold.
- Molecular Crystals: Formed from molecules held together by intermolecular forces. These crystals tend to have lower melting points and include substances like sugar and ice.
Essential Materials for Crystal Growing
Growing crystals at home can be an exciting and rewarding hobby, but before you dive into the process, it’s essential to gather the right materials.Fortunately, many of the supplies you need are readily available in your home or can be easily sourced from local stores.
1.Basic Ingredients
- Water: The primary solvent for most crystal-growing solutions. Distilled water is preferred as it contains fewer impurities that could affect crystal formation.
- Solute: This is the substance that will form the crystals. Common choices include:
- Sugar: Ideal for beginners, sugar crystals are easy to grow and can produce beautiful results.
- Salt: Table salt or Epsom salt can also be used to create interesting crystal structures.
- Boric acid: This is often used for more advanced crystal growing and can yield unique shapes.
2.Equipment
- Glass containers: Clear glass jars or beakers are perfect for observing the growth process. Ensure they are clean to avoid contamination.
- Stirring utensils: A spoon or stick for mixing your solution thoroughly is necessary to ensure even distribution of the solute.
- Heat source: A stove or hot plate may be needed to dissolve your solute in water, especially for substances that require heating to fully dissolve.
3.Optional Supplies
- Pipettes or droppers: Useful for adding precise amounts of liquid to your solution.
- Thermometer: Monitoring temperature can help optimize conditions for crystal growth.
- Acrylic sealant: To protect your finished crystals from damage and enhance their appearance.
4.Where to Find Materials
You can find most of these materials at local grocery stores, pharmacies, or craft stores.
For more specialized items like boric acid, check hardware stores or online retailers. Additionally, many household items can be repurposed; for example, old glass jars make excellent containers for your crystal-growing experiments. By gathering these essential materials, you’ll be well on your way to starting your crystal cultivation journey. Remember that patience is key; the best crystals take time to grow and develop their unique beauty!
Step-by-Step Guide to Growing Crystals at Home
Growing crystals at home can be a rewarding and educational experience. This step-by-step guide will walk you through the process, ensuring you have all the necessary information to cultivate beautiful crystals successfully.Materials Needed:
- Water
- Table salt or sugar (for basic crystal growth)
- A clean glass container (like a jar or beaker)
- A spoon for stirring
- A heat source (like a stove or microwave)
- A piece of string or a stick (optional, for hanging crystals)
- A clean surface for cooling
Step 1: Prepare Your Solution
Start by heating water in your container until it is nearly boiling.
Gradually add your chosen solute, such as table salt or sugar, stirring continuously until no more solute dissolves. This creates a saturated solution, which is essential for crystal growth.
Step 2: Cool the Solution
Once your solution is saturated, allow it to cool to room temperature. This cooling phase is crucial as it sets the stage for crystal formation. If you want larger crystals, consider letting the solution cool slowly.
Step 3: Initiate Crystal Growth
To encourage crystal growth, you can introduce a small seed crystal into the solution.
This can be a small piece of the same solute you used. Alternatively, you can let the solution sit undisturbed in a cool, dark place. Avoid moving the container during this time to prevent disturbances that could affect crystal formation.
Step 4: Monitor and Maintain
Check your crystals daily. If you notice that the solution is evaporating too quickly, cover the container with a lid or plastic wrap to slow down evaporation.
If you see any impurities forming on your crystals, gently remove them with a clean spoon.
Step 5: Harvest Your Crystals
After several days to weeks, depending on the conditions and materials used, your crystals should be ready to harvest. Carefully remove them from the solution using a spoon or by gently pulling them from the string or stick if you used one. Rinse them in cold water to remove any residual solution and let them dry on a clean surface.
Tips for Success:
- Use distilled water for better purity.
- Experiment with different solutes like Epsom salt or borax for varied crystal shapes.
- Keep your workspace clean to avoid contamination.
- Be patient; some crystals take longer to grow than others.
Choosing the Right Type of Crystals to Grow
When embarking on your crystal cultivation journey, selecting the right type of crystals to grow is crucial, especially for beginners. Some crystals are easier to cultivate than others, making them ideal for those just starting out.Here’s a breakdown of some of the best options for novice crystal growers, as well as a few that may present more of a challenge.
Best Crystals for Beginners
- Salt Crystals: One of the simplest and most accessible options, salt crystals can be grown using just table salt and water. By dissolving salt in hot water and allowing it to cool slowly, you can witness beautiful crystal formations.
- Sugar Crystals: Similar to salt, sugar can be dissolved in water to create stunning rock candy-like crystals. This method is not only easy but also delicious!
- Borax Crystals: Borax is another excellent choice for beginners. By mixing borax with hot water and letting it cool, you can grow large, clear crystals that are visually striking.
- Epsom Salt Crystals: Epsom salt is readily available and can produce lovely needle-like crystals.
This is a great option for those looking to experiment with different shapes and sizes.
Popular Crystal Types for Cultivation
As you gain confidence in your crystal-growing skills, you may want to explore more complex options. Here are some popular types of crystals that can be cultivated with a bit more effort:- Alum Crystals: Alum is a chemical compound that can yield beautiful octahedral crystals. The process requires careful temperature control and patience, making it suitable for those ready to take on a challenge.
- Quartz Crystals: Growing quartz crystals at home can be quite rewarding but requires specific conditions and longer timeframes. This option is best suited for those who have some experience with crystal cultivation.
- Copper Sulfate Crystals: These vibrant blue crystals are visually stunning but require careful handling due to the toxicity of copper sulfate.
This makes them more appropriate for advanced growers.
Common Challenges in Crystal Growth and How to Overcome Them
Growing crystals can be an incredibly rewarding hobby, but it is not without its challenges. Understanding the common problems that can arise during the crystal growth process is essential for achieving the best results.Here are some frequent issues and practical solutions to help you navigate the complexities of crystal cultivation.
1.Poor Crystal Quality
One of the most common issues faced by novice crystal growers is the formation of poor-quality crystals. This can manifest as cloudy or irregularly shaped crystals. To improve crystal quality, consider the following:
- Use Pure Materials: Ensure that you are using high-purity chemicals and minerals. Impurities can lead to defects in crystal structure.
- Control Temperature: Fluctuations in temperature can affect crystal growth.
Maintain a stable environment to promote uniform growth.
- Slow Cooling: Rapid cooling can lead to smaller, less defined crystals. Allow your solution to cool slowly to encourage larger, more beautiful formations.
2.Crystals Not Forming
If you find that your crystals are not forming at all, it may be due to insufficient nucleation. Here are some tips to encourage nucleation:
- Add Seed Crystals: Introducing small seed crystals into your solution can provide a surface for new crystals to grow on.
- Stirring the Solution: Gently stirring the solution can help distribute particles evenly and promote nucleation.
- Adjust Concentration: Ensure that your solution has the right concentration of solute. Too little solute may prevent crystal formation altogether.
3.Crystals Dissolving
If your crystals are dissolving instead of growing, it could be due to several factors:
- Temperature Changes: Sudden temperature increases can cause crystals to dissolve back into the solution.
Keep your environment consistent.
- Saturation Levels: Ensure that your solution is saturated enough to support crystal growth without being overly saturated, which can lead to instability.
- Avoid Disturbances: Minimize movement around your growing area, as vibrations can disrupt the delicate process of crystal formation.
4.Uneven Growth
If you notice that your crystals are growing unevenly, consider these adjustments:
- Even Distribution of Heat: Ensure that heat sources are evenly distributed if you are using heat to promote growth.
- Consistent Solution Composition: Regularly check and maintain the composition of your solution to avoid localized variations in concentration.
Creative Ways to Use Your Homegrown Crystals
Once you've successfully grown your own crystals, the next exciting step is to explore the myriad of ways you can incorporate them into your life. From decorative accents to unique crafting projects, homegrown crystals can add a touch of natural beauty and personal flair to your surroundings.Decorating with Crystals
Crystals can serve as stunning decorative pieces in any home. Here are some creative ideas:- Table Centerpieces: Arrange your crystals in a decorative bowl or on a tray as a centerpiece for your dining or coffee table.
This not only adds visual interest but also sparks conversation.
- Window Displays: Place your crystals on windowsills where they can catch the sunlight. The light refracting through the crystals creates beautiful rainbows and enhances the ambiance of your space.
- Shelf Arrangements: Use crystals to elevate the aesthetic of your bookshelves. Mix them with books, plants, and other decorative items for a curated look.
Crafting with Crystals
If you're feeling crafty, there are numerous projects you can undertake using your homegrown crystals:- Jewelry Making: Transform your crystals into unique jewelry pieces. Drill holes in smaller crystals to create pendants or earrings, or use wire wrapping techniques to make statement pieces.
- Art Projects: Incorporate crystals into mixed media art.
Glue them onto canvases or use them in resin art for a stunning visual effect.
- Home Fragrance: Combine small crystals with essential oils in decorative jars. Not only do they look beautiful, but they also add a pleasant aroma to your space.
Protecting and Caring for Your Crystals
Once you have successfully grown your own crystals, the next step is to ensure their longevity and beauty through proper care and protection. Crystals can be delicate, and their stunning appearance can be compromised if not handled correctly.Here are some essential tips for maintaining your crystals:
Handling Your Crystals
When handling your crystals, always remember to wash your hands first to avoid transferring oils or dirt onto their surfaces. Hold them gently, preferably by their base or edges, to minimize the risk of chipping or breaking. Avoid dropping them or placing them in high-traffic areas where they could be knocked over.Cleaning Your Crystals
Regular cleaning is vital for keeping your crystals looking their best. Here are some effective methods:- Water Rinse: For most crystals, a gentle rinse under lukewarm water is sufficient.
Avoid using hot water as it may cause thermal shock.
- Soft Cloth: Use a soft, lint-free cloth to wipe away dust and fingerprints. This method is particularly useful for polished or faceted crystals.
- Saltwater Solution: For tougher grime, a mild saltwater solution can be used. Soak the crystal for a few minutes, then rinse thoroughly with clean water.
Sealing Your Crystals
To protect your crystals from environmental factors such as moisture and dust, consider sealing them. Here are some options:- Acrylic Sealant: Applying a thin layer of acrylic sealant can provide a protective barrier against scratches and moisture.
Ensure the sealant is compatible with the type of crystal you have.
- Wax Coating: A natural wax coating can enhance the shine of your crystals while providing a layer of protection. Be cautious with this method as it may alter the appearance of some stones.
Storing Your Crystals
The way you store your crystals can significantly impact their condition. Here are some storage tips:- Individual Containers: Store each crystal in its own container or pouch to prevent scratching and damage from contact with other stones.
- Avoid Direct Sunlight: Keep your crystals out of direct sunlight to prevent fading and discoloration over time.
- Temperature Control: Store your crystals in a stable environment where temperature fluctuations are minimal to avoid stress fractures.
Conclusion: Embrace Your Crystal Growing Journey
As we conclude this comprehensive guide on crystal cultivation, it’s essential to reflect on the journey you are about to embark on.Growing your own crystals is not just a hobby; it’s an exploration of science, art, and patience. The process of nurturing these beautiful formations can be incredibly rewarding, offering both aesthetic pleasure and a deeper understanding of the natural world. Throughout this article, we have covered various aspects of crystal growth, from the fundamental principles of nucleation to the specific techniques for cultivating different types of crystals. Remember that the key to successful crystal growing lies in your attention to detail and your willingness to experiment. Each attempt will teach you something new, whether it’s about the materials you use or the conditions that best support crystal growth. Here are some important takeaways to keep in mind as you start your crystal growing adventure:
- Choose the Right Materials: Start with pure minerals and high-quality glassware to ensure optimal results.
- Be Patient: Crystals that take longer to grow often exhibit more intricate structures and greater durability.
- Experiment with Conditions: Varying temperature, concentration, and cooling rates can lead to different crystal shapes and sizes.
- Protect Your Creations: Consider sealing your crystals with acrylic or other protective coatings to preserve their beauty.
Keeping a journal of your experiments can help you track what works and what doesn’t, allowing you to refine your techniques over time. Share your experiences with fellow enthusiasts or online communities; you may find inspiration and tips that enhance your skills further. In conclusion, embrace the challenges and joys of growing your own crystals. Each unique formation is a testament to your efforts and creativity. So gather your materials, set up your workspace, and let the magic of crystal cultivation unfold before you.
Happy growing!.